Point-source stereo recording: XY, ORTF, spaced pair and Blumlein
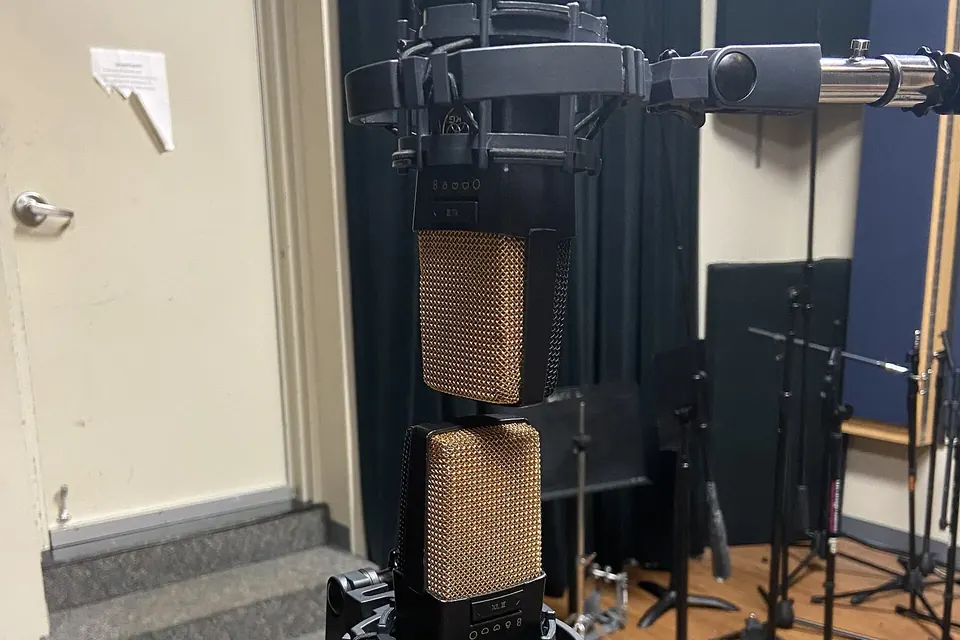
Two figure-of-eight microphones mounted on one stand as a Blumlein pair, capsules one above the other. Photo: The Midnite Wolf, Wikimedia Commons, CC0 1.0.

Before multitrack studios, much classical and jazz recording was done with a single stereo pair: two microphones in one place, capturing the performers and the room as a listener in a good seat would hear them. It remains the most natural way to record acoustic music, and it needs only two matched microphones, a stand and a two-channel recorder.
How two microphones make a stereo image
Our ears locate sounds from two cues: the difference in level between the ears and the difference in arrival time. Stereo microphone pairs use one or both of these:
- Coincident pairs (XY, Blumlein, Mid-Side) place the two capsules as close together as possible, angled apart. Sound reaches both at the same moment, so only level differences create the image. The result is precise and sums to mono cleanly.
- Spaced pairs (AB) set the microphones apart, usually pointing forward. Time differences dominate. The sound is spacious, with good low-frequency response, but less precise, and summing to mono can cause comb filtering.
- Near-coincident pairs (ORTF, NOS) combine a small spacing with an angle, using both cues.
The idea of using two coincident directional microphones to record stereo goes back to the British engineer Alan Blumlein, whose 1931 patent described stereo recording and reproduction.
The standard arrangements
| Technique | Microphones | Geometry | Character |
|---|---|---|---|
| XY | Two cardioids | Capsules stacked, commonly 90° apart | Stable, focused image; less sense of space; fully mono-compatible |
| Blumlein | Two figure-of-eights | Crossed at 90° | Natural image and room sound; rear sounds also appear in front |
| Mid-Side (MS) | One cardioid forward, one figure-of-eight sideways | Coincident; decoded to left and right | Width adjustable after recording; mono-compatible |
| ORTF | Two cardioids | 17 cm apart, 110° between them | Wider than XY, still reasonably mono-compatible |
| NOS | Two cardioids | 30 cm apart, 90° between them | Wide; a common choice for overheads |
| AB spaced pair | Two omnis (usually) | Parallel, spaced apart; spacing sets the width | Spacious, warm bass; weaker centre; can comb-filter in mono |
The angles and spacings for ORTF and NOS are the ones published by DPA Microphones in its technical guides; they are starting points, not laws. For XY, DPA notes that a wider sound source calls for a narrower angle between the microphones and vice versa.
Choosing a technique
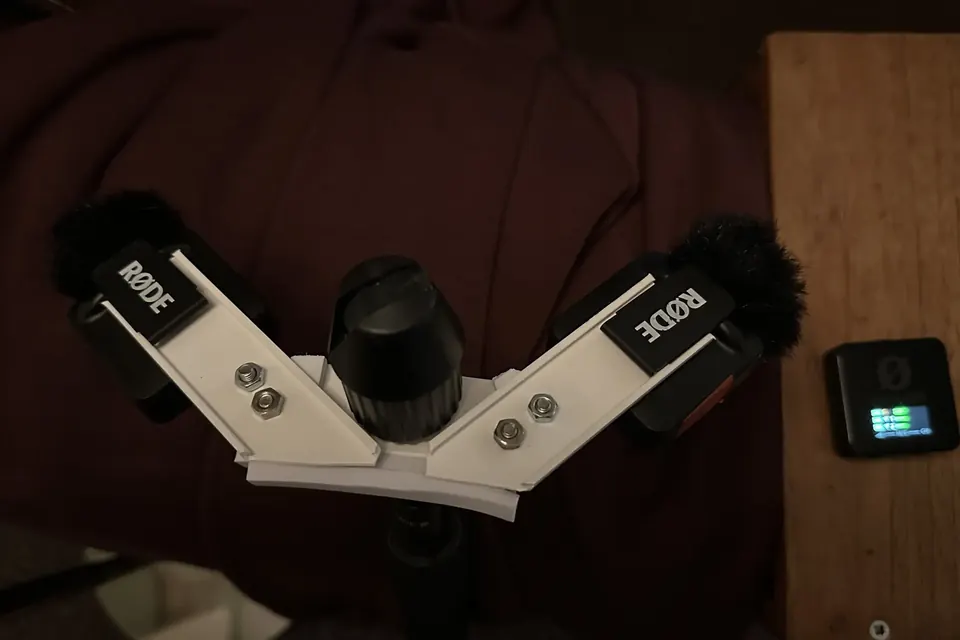
For a first recording of a choir, a string quartet or a piano in a pleasant room, XY or ORTF with a matched pair of small cardioid condensers is the safest start: they are forgiving, mono-safe and easy to set up on one stand with a stereo bar. Blumlein needs figure-of-eight microphones and a good-sounding room, because it hears the back of the room as clearly as the front. A spaced omni pair can sound beautiful in a fine hall but is the least predictable in an ordinary one.
If the recording may be played on radio, phones or a single speaker, prefer a coincident technique, or check your spaced recording carefully in mono.
Placement: where the pair goes matters most
- Start where it sounds good. Walk the room while the musicians play and listen. A good starting point is often a few metres in front of the ensemble, at or slightly above head height, aimed at the centre.
- Distance sets the balance. Closer gives more detail and less room; further back gives more reverberation and a blended sound. Move in steps of half a metre or so and compare.
- Height sets the blend. Raising the pair evens out front and back rows of a choir or ensemble.
- Width is set by angle or spacing. If the ensemble crowds the centre of the image, widen the angle (or spacing); if it falls into two halves with a hole in the middle, narrow it.
- Keep the pair symmetrical. The centre of the ensemble should be on the centre line of the pair, or the image will lean.
Matched pairs
The two microphones should be the same model and, ideally, a factory-matched pair, with both channels of the recorder set to exactly the same gain. A level difference of even a couple of decibels between channels shifts the whole image to one side.
Levels, monitoring and the recorder
Acoustic music has a wide dynamic range, so set levels during the loudest passage of a rehearsal and leave generous headroom: with 24-bit recording, peaks well below full scale cost nothing in quality. Use closed headphones to check for noise, handling and hum, but judge the stereo image on loudspeakers afterwards, and listen in mono as well. Record a short spoken slate at the start of each take with the date, piece and microphone setup; it becomes metadata later, as described in our archive overview.
Recording on location
A stereo pair is ideal for recording concerts, services and rehearsals in their own spaces. Ask permission from the performers and the venue first. Arrive early to set up during the rehearsal, tape cables down where people walk, and use foam or fur windshields outdoors. Battery-powered recorders avoid hum from shared mains circuits; carry spare batteries and memory cards, and start recording a little before the music begins.
Common problems
- Hole in the middle: spacing too wide on an AB pair. Bring the microphones closer together, or add a centre microphone.
- Everything in the middle: angle too narrow, or the pair too far away. Widen or move closer.
- Thin or hollow in mono: phase cancellation between spaced microphones. Try a coincident pair.
- Rumble: footsteps and traffic travel through stands. A shock mount and the recorder's low-cut filter, used sparingly, help.
Sources
- DPA Microphones, Mic University, Stereo recording techniques and setups.
- RØDE, Stereo microphone techniques.
- A. D. Blumlein, British patent GB 394,325, "Improvements in and relating to sound-transmission, sound-recording and sound-reproducing systems", filed 1931; see the Espacenet record.
- IASA, IASA-TC 04 guidelines (resolution and file formats for new recordings intended for preservation).
 Recording & transfer
Digitising a home music archive
Sort, prioritise, capture once, name it well, keep three copies. The plan behind every transfer guide.
 Recording & transfer
Reel-to-reel and cassette to digital
Check the tape first, set azimuth by ear, decode noise reduction correctly, capture at 24 bits.
Good hi-fi on a tiny budget
Speakers first, secondhand amplifiers, free gains from placement, and nothing spent on magic cables.