Reviving a vintage turntable: belts, speed, stylus, arm set-up and the phono stage
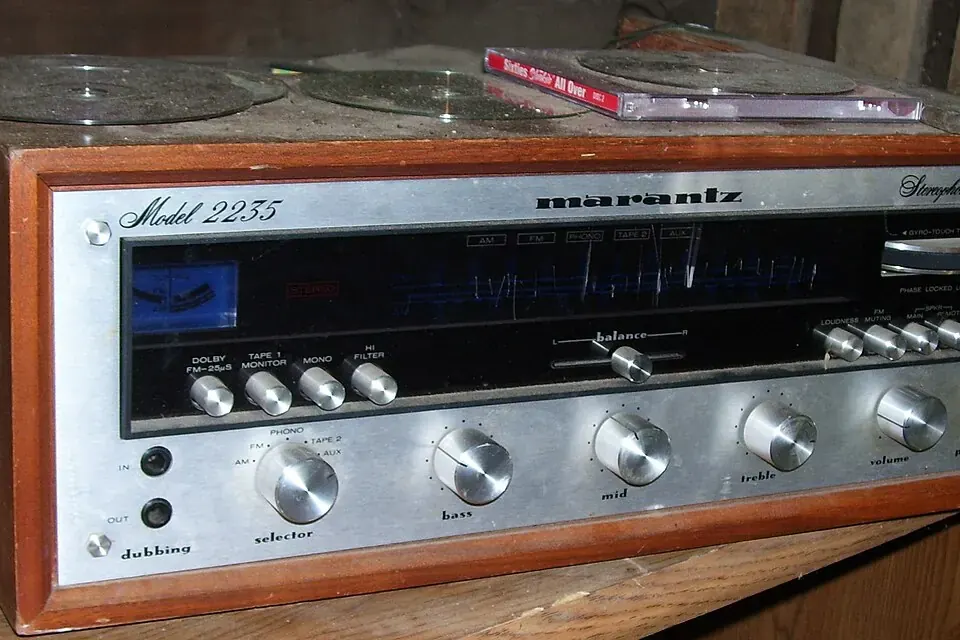
A receiver of the turntable era: its phono input, not the deck, does the delicate work of amplifying and equalising the signal from the cartridge. Photo: Daniel Christensen, Wikimedia Commons, CC BY 3.0.
An old turntable is mechanically simple, and that is exactly why people rush it. The platter spins, the arm lowers, music comes out, and the damage is invisible: a worn stylus chiselling the groove walls, a tracking force set by guesswork, a phono input that was never meant for that cartridge. A methodical hour on the bench before the first precious record goes on is the best investment you can make.
Start with the right order of work
Work from the motor to the stylus, then from the stylus to the amplifier: there is no point aligning a cartridge on a deck that runs slow. A sensible sequence is:
- Safety and mains wiring.
- Drive system and speed.
- Main bearing, suspension and the arm's mechanical parts.
- Cartridge and stylus inspection.
- Arm set-up: balance, tracking force, anti-skate, alignment.
- Connection, grounding and the phono stage.
Find the service manual or at least the owner's manual first. It gives belt dimensions, lubrication points, the arm's intended overhang and the original adjustment procedures. Our guide to finding service manuals and schematics explains where to look.
Safety first, even on a "simple" deck
A turntable motor runs from the mains, and many older decks have a mains switch with a suppression capacitor across it. Old paper-cased suppression capacitors are known to crack with age and can fail with smoke and a smell. Before plugging in a deck that has not run for years, open it with the plug out, look for cracked or swollen components and scorched wiring, and check that the mains lead is sound and correctly anchored. If any of this is unfamiliar, read the safety section of what fails in vintage hi-fi before going further, or leave the mains side to a technician.
Know your drive system
How the motor turns the platter decides what has worn out.
- Belt drive. A small motor pulley turns the platter, or an inner sub-platter, through a rubber belt. Belts stretch, go shiny or turn sticky over decades. A tired belt causes slow speed, slow start-up and audible wow on sustained notes. Replacement belts are cheap if you know the exact size.
- Idler (rim) drive. A rubber-tyred wheel sits between the motor pulley and the inner rim of the platter. When the rubber hardens or develops a flat spot from being left engaged, you get rumble, a rhythmic thump and slipping. Idler wheels can sometimes be re-tyred or re-ground.
- Direct drive. The motor is built into the platter hub and controlled electronically. There is no rubber to perish, but the speed-control circuit has its own adjustments, ageing capacitors and trimmer potentiometers. Speed drift or instability on these decks is an electronic fault rather than a mechanical one.
Before fitting new rubber parts, clean old residue off the motor pulley and platter rim, using only cleaners the manual says are safe.
Checking speed
Records are played at 33⅓ and 45 rpm, and older shellac discs at around 78 rpm. Many decks have a strobe ring on the platter edge, lit by a small lamp: when the speed is right the dots appear to stand still. Printed strobe discs work the same way under mains lighting, but they are made for a given mains frequency (50 Hz or 60 Hz), and they may not give a steady pattern under some LED or fluorescent lamps. A speed-measuring smartphone app is a useful cross-check.
A deck that is slightly off speed can often be trimmed with the pitch control or an internal adjustment described in the manual. A deck that drifts, surges or will not reach speed needs the drive problem fixed first: belt, idler, bearing friction or, on direct-drive models, the control electronics.
Bearing, suspension and the arm's mechanics
Lift the platter off and inspect the main bearing. Old oil thickens and collects dust; the usual service is to clean out the spindle and well and re-oil with the type of oil the manufacturer specifies, not with whatever is on the shelf. A rough, grinding bearing transmits rumble straight into the stylus.
On a suspended deck, check that the springs bounce freely and that any transit screws are released. Automatic and semi-automatic decks have cam mechanisms lubricated with grease that hardens over the years; a deck that fails to return the arm or refuses to cycle usually needs that mechanism cleaned and lightly re-greased.
The cueing lift deserves special attention. It is damped by a thick fluid, and when that dries out the arm drops onto the record instead of descending gently. Until it is re-damped, lower the arm by hand.
The cartridge and the stylus
Identify the cartridge before anything else, because everything downstream depends on it.
- Moving magnet (MM) and similar high-output magnetic types usually have a user-replaceable stylus assembly. They expect a standard phono input, conventionally a 47 kΩ load.
- Moving coil (MC) cartridges have a much lower output and usually need a dedicated MC input or a step-up transformer. Their stylus is generally not user-replaceable.
- Ceramic and crystal cartridges, common in old all-in-one record players, produce a large signal and were designed for different inputs and heavier tracking forces. They are not a direct match for a magnetic phono stage.
Then look at the stylus itself, under a strong loupe or a cheap USB microscope. Check that the cantilever is straight and centred, not bent, pushed back into the body or missing its tip, and that the tip is not chipped or flattened. A stylus of unknown history is a risk to your records: if in doubt, replace it. Genuine replacement styli are still made for many popular cartridges, and third-party replacements exist for others, though quality varies. Our guide to tracking down rare components covers how to search by exact part number.
Setting up the arm
With a stylus you trust, set the arm in this order. Use the figures from the cartridge maker's instructions, not from a forum post about a different model.
- Balance. Set anti-skate to zero, then move the counterweight until the arm floats level with the stylus just above the platter. If the counterweight has a force scale, set it to zero at this point without turning the weight itself.
- Tracking force. Dial in the force recommended for the cartridge. Then check it with a stylus force gauge, because old scales and springs drift. A force that is too light is not "gentler": the stylus can lose contact with the groove walls on loud passages, mistrack and cause damage of its own.
- Anti-skate. As a starting point, set it to the value the arm's scale indicates for your tracking force. Anti-skate counteracts the force that pulls a pivoted arm towards the centre of the record.
- Overhang and offset. A pivoted arm can only be exactly tangent to the groove at two points across the record. A protractor, printed or bought, positions the stylus to minimise tracking error according to a chosen geometry, such as those named after Baerwald, Löfgren or Stevenson. Use the arm maker's mounting distance and the protractor intended for it.
- Height and azimuth. Start with the arm roughly parallel to the record when the stylus is in the groove, and the stylus vertical when seen from the front.
Connection, hum and the phono stage
A magnetic cartridge produces a very small signal, and records are cut with bass reduced and treble boosted. The phono stage applies the reverse curve and the necessary gain: for records made since the mid-1950s this is the RIAA equalisation curve. A line-level input gives a thin, quiet sound; a phono input meant for another cartridge type gives wrong levels or noise.
Most decks have a separate earth wire, which goes to the amplifier's ground terminal. A loud hum that changes when you touch the arm or the cable often means that wire is missing or loose. Inspect the fine tonearm wires and the cartridge tags for corrosion, and use short, sound interconnects: magnetic cartridges are sensitive to cable capacitance.
Finally, place the deck on a level, stable surface away from the speakers, so that their vibration does not feed back through the stylus.
When to stop and get help
Bent cantilevers, intermittent arm wiring, a direct-drive deck that hunts for speed and any mains fault are jobs for a technician. Still choosing a deck? The checklist in buying used vintage hi-fi helps you spot a tired one before you pay.
Sources
- RIAA equalisation curve, overview and history: Wikipedia, "RIAA equalization".
- International Electrotechnical Commission, IEC 60098, Analogue audio disk records and reproducing equipment.
- Manufacturers' installation instructions for magnetic phono cartridges, and owner's and service manuals for the turntable concerned (tracking force, anti-skate, overhang and lubrication).
 On the bench
What fails in vintage hi-fi
Capacitors, pots, relays, belts and bias, and why safety comes before any of them.
 On the bench
Service manuals and schematics
Where legitimate copies live, what a service manual contains, and how to read a schematic.

Buying used vintage hi-fi
Research the model, test what you can, budget for service, and know when to walk away.